100 Miles Down the River How to Build Your Raft
From scrap pile to storm-ready deck.
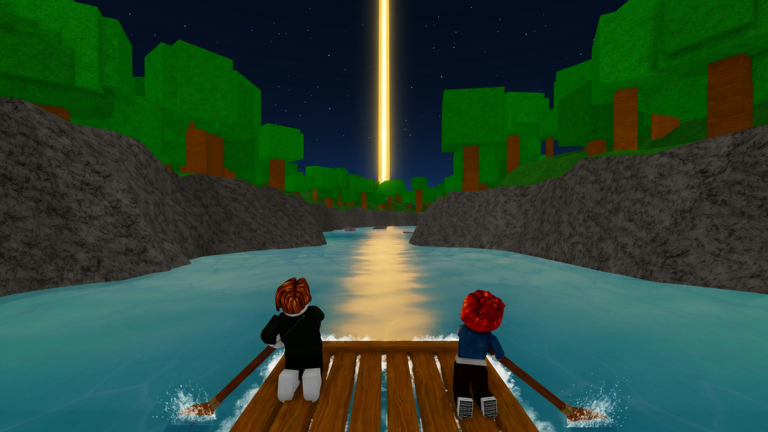
Build for the storm, not the screenshot
A pretty raft that sheds boards at Mile 15 is a floating coffin. This guide walks through a practical build order for 100 Miles Down the River so your deck survives fish bites and storm torque. Use it with raft upgrades, storm gear, and Getting Started.
Materials mindset
Expect early resources to be wood, scrap, and salvage along the banks. Prioritize:
- Frame pieces that actually float
- Plates that cover high-splash edges
- A mount point for light
- Space for kits and crates
Ignore statues until the tier list says you are allowed to flex.
Step-by-step first raft
1. Frame
Create a compact rectangle or square large enough for your squad to stand without overlapping the waterline. Oversized first rafts flex and snap.
2. Flooring
Fill gaps. Missing floorboards are swim invitations when currents hit.
3. Light mount
Center or slightly forward of center so bow paddlers stay lit. Test the radius before launch.
4. Corner braces
Storms twist joints. Brace every corner even if walls look optional.
5. Repair access
Leave a clear mid path so the repair lead can reach any edge without parkour (controls).
6. Storage
One crate inside the light bubble for kits and fuel. Second crate only after plating is done.
7. Paddle positions
Mark seats or stand spots for synced thrusting. Chaos paddling spins you into rocks.
Build variants
Starter skiff (1–3 players): tiny, braced, one lantern, two kit stacks.
Squad barge (4–8 players): wider deck, dual edge glow, dedicated repair lane, storage aft.
Endgame pusher: still not a palace — reinforced everything, redundant light, clear waterfall sightline (Reach Mile 100).
Common construction mistakes
- Building tall before wide braces exist
- Putting the only lantern on a detachable decorative post
- Storage hanging past the rail where waves delete it
- No walkable repair lane through clutter
- Asymmetric weight that flips in rapids
Mid-run rebuilding
When fish open a hole:
- Call the side.
- Hold light steady.
- Patch with kits.
- Add a plate if scrap allows.
- Only then resume mileage.
If the raft is critically broken, eddy out to a bank and rebuild minimum float instead of “pushing through.” How to Survive covers the triage order.
Co-op build roles
- Architect: decides footprint
- Scavenger: feeds scrap (players)
- Installer: places plates and mounts
- QA: walks every board before launch
Rotate installers so more people understand the structure when someone disconnects.
Quality checklist before every push
- Light works and has fuel
- Kits in crate + hotbar
- Corners braced
- No loose floor gaps
- Paddle spots assigned
- Cosmetics not blocking repair paths
Fail any box → fix before chasing miles.
Spending scrap after codes
If codes drop currency, buy plates and braces before skins. Cosmetics do not seal holes.
Related pages
- Raft upgrades tier list
- How to Survive
- Co-op roles
- Updates for build-changing patches
Shore-to-raft workflow
Efficient builders treat the bank like a staging table. Drop scrap in a pile beside the waterline, craft or place the next plate, then sweep leftovers into the lit crate. Do not scatter resources across three beaches — that is how scavengers die fetching one board.
When friends join mid-build, assign them a single wall or corner instead of letting everyone place randomly. Conflicting footprints create seams that storms exploit. If two architects disagree, the captain picks one plan and the other person becomes QA walker.
Weight, balance, and swimming saves
Heavy decoration on one rail tips the raft when current hits the opposite side. Keep mass centered. If a player falls overboard, throw a light-facing rescue: paddle the bubble toward them rather than sending three people into dark water. Practice one intentional swim-rescue during a calm mile so the panic version works later.
Tool and prop awareness
Axes, ropes, and story props appear in community runs. If a tool doubles as a gathering implement, store it on a central rack inside the light. Lost tools mid-storm turn simple repairs into scavenger suicide missions. After each wipe, rebuild the rack before vanity flags.
Night building ban
Do not expand the footprint during peak storm. Patch only. New boards placed in thunder rarely get braced correctly, and the hunter fantasy punishes players kneeling at the unlit edge with a hammer. Sunrise is for ambition; midnight is for seals and fuel.
Frequently Asked Questions
Quick answers for river survivors.
How big should my first raft be?
Compact enough for your squad to stand with braces and a center light — avoid mansion decks on session one.
Where do I place the lantern?
Mid-deck or slightly forward so corner paddlers remain inside the light radius.
What do I build after the frame?
Flooring, light mount, corner braces, repair access, then storage and paddle positions.